Gamebuino META Manual
![]()
By JulienGio, 5 years ago
Overview
The Gamebuino META lets gamers to play the great pixelated games they loved on a compact device and learn programming to make their own games. The Gamebuino META fits in a pocket, packs plenty of free exclusive games, and the battery will last through a continuous day of gaming. An optional micro SD card can fit more games than you can play, and players can switch between games in a matter of seconds.
Specs:
- Body size: 105mm x 54mm x 17mm
- Microcontroller: ATSAMD21, 32bit ARM Cortex M0+, 256KB flash, 32KB RAM (same as Arduino Zero)
- Display: 1.8", 80*64px RGB 16bit color display (or 160*128px, indexed 16 colors). 25FPS refresh rate by default, up to 50FPS.
- Battery: 900mAh, charged through micro USB B port (like most phones).
- Back lights: 8 independently controllable RGB LEDs for light effects in your palms!
- Buttons: 8 buttons: D-pad, A, B, Home, Menu.
- Sound: 10bit DAC, multi-channel 8bit WAV playback, 2.5W class-D audio amp, audio jack 3.5mm, 1W speaker.
Let's look at how to use your console. For more information on what the Gamebuino is, head over to this page.
How to use your gamebuino
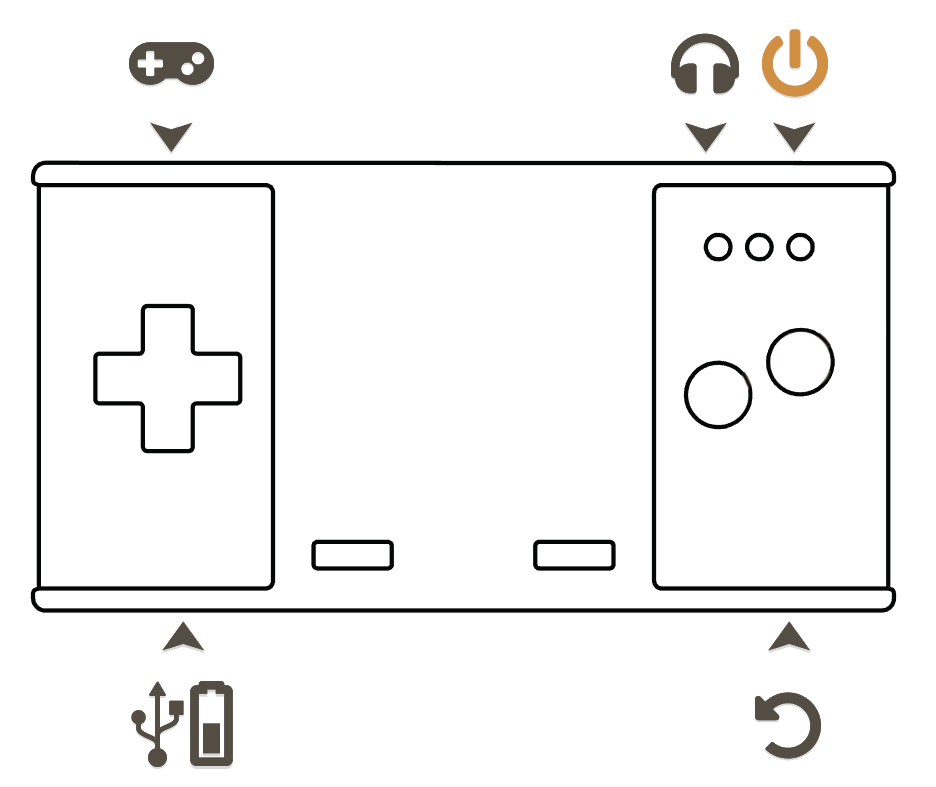
- Power Slide switch to turn your Gamebuino on or off.
- SD card Where all your games go. You can use the provided micro-USB adapter to add games by following this method.
- Audio jack: The 3.5mm audio jack to plug in headphones or external speakers.
- USB: A micro-USB port used to charge the battery and develop game as well. Nearly all standard microUSB cables are compatible.
- Reset Single tap to reset. Double tap to flash the loader from the SD card if available, otherwise, the console will enter the bootloader.
- A button Select / Primary action
- B button Cancel / Secondary action
- Menu Game-dependent menu, can be used to open inventory, see the map, etc.
- Home Exit a game, adjust sound volume & light intensity, take screenshots and screen recordings.
Programming
Your console was not only designed as a gaming console. We took the time to turn this product into a creation tool. You can create your own games in C++! Setting up the environment is simple, and the possibilities of games are endless. Making games on the Gamebuino is for all levels, beginners and experts alike.
Backpacks
On the back of your Gamebuino, there are a series of input and output pins. These are all the Arduino pins. These allow you to do electronics with your console. This is the layout of the pins:

If this interests you, go ahead and print it, it is of great help ;)
Developer backpack
We also have a backpack made to develop backpacks! It is called the developer backpack. 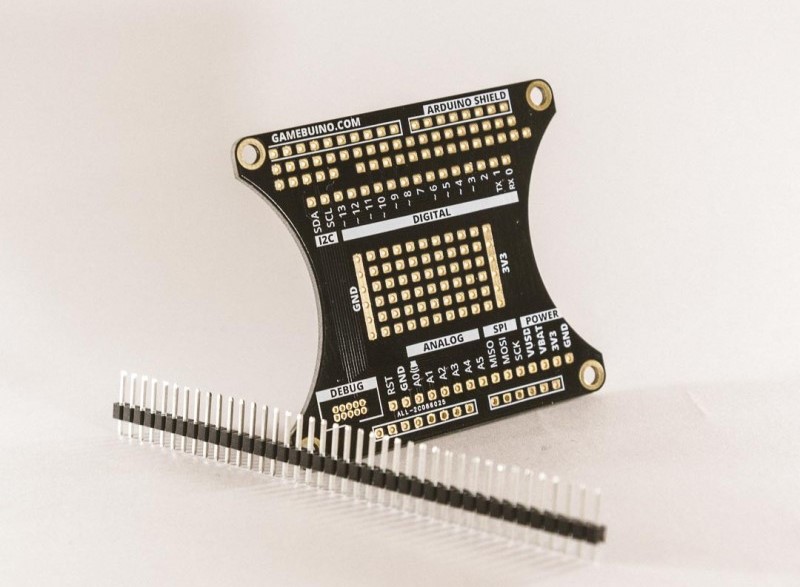
This cheap extension allows you to split up all the pins on the back so you have an easy-to-use test circuit directly on the Gamebuino. It is also compatible with Arduino shields.
You can own one here!
Making your own backpack
So you had an idea for a backpack. Then, you designed it with the developer backpack. You tested it. You improved it. Now what? Well you could print it's own PCB to directly place on the Gamebuino. Maybe even sell it. We want to help you create, so here are some files that will help you :)